Case Binding
- Crystal J Ann

- Jul 18, 2022
- 6 min read
Updated: Aug 6, 2022

27th May
I started with another notebook and this time I did everything by myself and the stitching was very by far. It looks very good and I didn’t end up with any tangled knots that weren’t supposed to be there.
I used thick black paper for the endpapers to see how that could make a difference. My favourite part of the process is being able to use the guillotine. Trimming the text block without a guillotine requires a lot of strength and stability, as I want to continue making books after this course I need to look for an alternative solution.
Other than the casing itself, I think this notebook come out very good. I made one last notebook using the case binding technique before I moved on to another binding technique. In this last notebook, I did make mistakes. Mainly what I did was make the boards the same size as the text block. While that isn’t necessarily a bad thing and Gen said books like that do exist, I personally like it when the text block sits inside the case.
Case Binding

In the world of bookbinding, case binding is a method that is popularly used with hardcover books. Also known as hardbound, hardback or case bound, the case binding process is used for most types of hardcover books, for example, reference books, yearbooks, children’s books, novels, coffee table books and so on. The books are constructed by bringing together a block of papers which are then either section sewn, PUR, perfect or lay flat bound into a rigid cover with end papers. The cases can be customized using cover fabrics and materials, coupling them with speciality finishing techniques such as foiling or embossing to give each book a beautifully finished look, printed dust jackets are also used to customize them.
Although this method is time-consuming and can be expensive, it is also the most durable way to bind books and provide a sturdy, long-lasting method of protecting books. Case binding has been used since the 1820s as a method to bind books for centuries. It also exudes a feeling of quality and weight.
It uses a hard board cover as a case which wraps around the block of pages (Also known as text block) to protect the book. The cover is then attached to the text block by endpaper which is glued to both the inside of the cover and the first and last page on both sides respectively. The text pages can be either glued using PVA glue and sewn or entirely glued together to Lay Flat.
With Case Binding, we can customise the exterior finishes, interior text design, endpapers and paper edges for a unique book. Cases themselves can be customized with various materials including fabric or classic leather and finished with various options for a complete look.
Case Binding Styles:
One Quarter Binding

The spine is covered in one material (i.e. cloth) while the sides with another material (i.e. paper). The proportion of spine material to side material is approximately 1:3. The corners are not covered in a quarter binding. Occasionally a reinforcing material (paper on vellum) will be placed over the corners of the board but are then covered with the side materials, and so are not seen. This is not considered covered corners.
Half Binding

The spine is covered in one material while the sides with another. The proportion of spine material to side material is approximately 1:1. The spine and small area of corners is covered in one material (i.e. leather) while the sides with another (i.e. cloth).
Three Quarter Binding

A large spine and corner areas are covered in one material (i.e. leather) while sides with another (i.e. cloth). The proportion of spine and corner material to side material is approx. 3:1. In this example, if the corners were not covered, the depth of the spine material into the sides would classify it as a half binding.
Techniques for making Book Covers:
Every book is unique. And each cover should be as unique as the stories told within.
Die Cutting
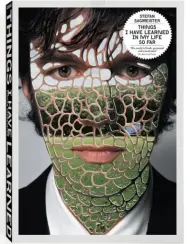
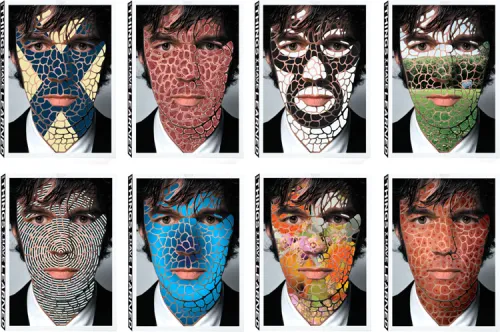
Source: Jonathan Safran Foer‘s Tree of Codes and Stefan Sagmeister's Things I have learned in my life so far.
Die cutting is a very unique bookbinding technique that adds a very engaging dynamic and new dimension to your product. Using die cutting, you can cut out windows in pages, dust jackets, or even covers to reveal images or text below. If done correctly, this can create a beautiful and creative effect. Die cutting can be used in lots of different projects. One possible use is as a nice subtle touch to develop a theme. A bullet hole through the dust jacket makes a murder mystery that much more visceral, for example. But where die cutting really shines is in artistic projects that are heavy on graphics. Photography books are one example of this. Graphic and visual arts books are another, allowing the author to use the book itself as a medium. Children’s books are also great for die-cutting, as kids will love the hide and seek effect it creates.
Embossing
Shortly after the 15th century, personalizing stationary by embossing, engraving and other methods became a popular request. These methods go as far back as hand-engraving of materials like leather. Embossing came to be more widely used in the early 19th century with the modernization of printing services being more affordable.
Embossing and debossing are the processes of creating either raised or recessed relief images and designs in paper and other materials. An embossed pattern is raised against the background, while a debossed pattern is sunken into the surface of the material (but might protrude somewhat on the reverse, back side).
Embossing is used to create a distinctive visual effect by altering the surface of paper stock or other substrates, providing a three-dimensional or raised effect on selected areas.
Foil Stamping
Foil stamping can be traced back to thousands of years when gold was pounded to decorate coffins. Centuries later, gold was stamped onto leather-bound book covers by machine. The process was refined over time and by the 20th-century gold was replaced with metallic foils to reduce the costs of foil stamping. Foil stamping is the application of metallic or pigmented foil onto a solid surface by application of a heated die onto foil, making it permanently adhere to the surface below leaving the design of the dye.
Foil stamping brings an entirely new layer to a book’s finishing. Choosing the right finish separates your project from the rest whether for luxury or finesse.
Foil stamping can be used in combination with embossing or debossing to create greater visual impact.
Book binding Techniques for Edges:
Edge Gilding
A most luxurious print finishing technique, edge-gilding is the application of a metal leaf or foil to the edge of a paper-based item.
The edges of the most precious books had gold leaf applied, partly for aesthetic and partly for practical reasons. The aesthetics are clear to see: it looks amazing and impresses upon the reader that they are handling something that is very precious.
Perhaps less known are the practical reasons. The thin layer of metal sealed the edges of the paper, protecting the page edges, and making them impervious to dampness and dust.
Sources:
Edge Marbling
Marbling is a unique art form that has been practised for hundreds of years. The art of manipulating and capturing fluid dynamics began in Japan with the practice of suminagashi (literally "floating ink") in the 12th century. The ebru style of marbling flourished in the Islamic world beginning in the long 16th century. Travellers to the Middle East brought marbling to Europe in the seventeenth century. Some of the earliest examples of marbled edges can be found on leather bindings of the 17th century, though the practice was most common in works of the 19th century. The patterns were many and varied and often at the binder’s discretion, though they were always expected to match the design with that of the endpapers. There were three different methods for edge marbling: the traditional process which involved placing the edge of the book on the tray of colours and size; the transfer of patterns from existing marbled papers, and the use of the roller.
There are many other ways and techniques to truly make handmade and bespoke books.
Sources:
Cover to Cover: Exposing the Bookbinder's Ancient Craft | Rare Books & Manuscripts (adelaide.edu.au)
Basic Bookbinding by A.W. Lewis


Comments